

My Grammarly browser add-on marking the word “Widget” as a wrong spelling underline but if we check it with WP, it’s a common name and feature of WordPress that most of the user use even its a default feature comes with every intake theme like Twenty Sixteen.
Using Widget option, a WordPress WebPage would not only just look good, it also get a life to make a visitors able to do or find a thing quick. Let’s see how we can use Widget to make a simple quick navigation menu with Link that will help to lift to other important page or post.
Actually, I was working on a project where I was in need of adding a quick navigation on footer area that looks like Quick Menu. But the theme I was working with did not allow me to add any custom text menu and link on that related built in(with that theme I was working with) widgets. The only option was to select menu from Top, Main, and Footer and if I select one of them, the full set of menu seeing-up. So I planned to do it another way that really works for me. Let’s see how I did it using “WordPress built-in Text Widget”
Requirement:
You need to have installed WordPress with a default text widget(you can check it from Appearance -> Widget) with necessary CSS and other files so when we will place some HTML code into that widget, that works.
Necessary Steps:
- Go to Appearance -> Widget and seek the Text widget to your blog or website’s pre-assigned sidebar or footer area. You will see a Title field as well as Text field.
- Write the title as “Quick Navigation” or something else you want your visitors mean those are some quick menu or navigation by.
- Place those code below instead of simple text. So we can get a navigation look.
<ul style="list-style-type:none">
	<li style="margin-bottom: 7px;"><a href="#"><strong>Our Service</strong></a></li>
	<li style="margin-bottom: 7px;"><a href="#"><strong>How It Works</strong></a></li>
	<li style="margin-bottom: 7px;"><a href="#"><strong>File Upload</strong></a></li>
	<li style="margin-bottom: 7px;"><a href="#"><strong>Payment Policy</strong></a></li>
	<li style="margin-bottom: 7px;"><a href="#"><strong>Submit Free Trial</strong></a></li>
	<li style="margin-bottom: 7px;"><a href="#"><strong>Ask for Quote</strong></a></li>
	<li style="margin-bottom: 7px;"><a href="#"><strong>Partner Program</strong></a></li>
</ul>
- You could custom the title of every list element, or you can un-strong the element by removing the strong(both starting and ending). You can also modify the line marking space changing the 7px to your choice.
- If you did everything in same way, you may get the results like below screenshot:
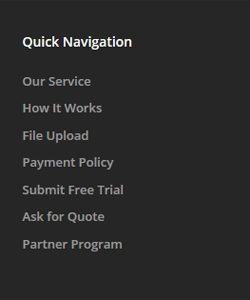
Eg: Background color and title results will depend on your theme SourceCode. You can change or modify them from Style file. This is what I was coded in my style file.
Hope this note helps you out. If any question, or issue- just comment below. Have FUN, and HAPPY CODING 🙂
